Do you love to accessorize your dog with bandanas? Given my love of style and my dog, I was actually pretty reluctant to dress Lucy up in cute things. It wasn’t until my old dog Lola got to be a senior lady and needed a sweater and booties to keep her warm on winter walks that I finally accepted that dressing your dog up is fun!
Labradors aren’t the kind of dogs you can put in t-shirts and jackets all the time (although Lucy has a growing collection for winter and rainy days!), so I’ve discovered the joy of cute DIY dog bandanas!
It’s a great DIY project to start off with if you’re new to sewing doggy fashions. Plus, there’s no limit to how many dog bandanas you can make! Swap them out for different events, holidays and days of the week.
Want to learn how to make the cutest DIY reversible dog bandanas so your pup can be stylish all year? Keep reading and I’ll teach you how to make your own double sided dog bandana pattern.

Making The Cutest DIY Reversible Dog Bandanas
Since I love to make my own things, I decided to make this cute double sided dog bandana pattern for Lucy’s Summer wardrobe. Y
ou can make your own simple dog bandanas by simply cutting a triangle out of a piece of fabric. But eventually, the edges will fray if they aren’t sewn. That might be good enough for a 1-day use, but I wanted to make bandanas Lucy and I could enjoy for months (or years!).
When I want to find cool fabrics I head to an awesome independent fabric store here in Pittsburgh called Loom. They carry really great prints on cotton fabric in addition to gorgeous luxurious home decor and fashion fabrics that I always have to browse when I’m there.
I bought this funky squirrel fabric and wood print pink fabric there. You can have a lot of fun with fabric combos for these dog bandanas!

If you don’t have a great local fabric store to shop local, you can also look for 100% cotton fabrics at Joann Fabrics or on Etsy and Spoonflower. They all have tons of great options for your reversible dog bandana. The hard part will be deciding which fabric to use first!
For these double-sided doggy bandanas, I use different fabrics that have complementary colors so they mix and match well.
My two favorites are the indigo shibori print and the beetles print. The shibori is very on-trend (you can buy a similar print from Joann’s or Amazon) and the beetles are very Summery – we find actual beetles on our walks all the time!
There are TONS of fabric options at Joann’s that would be perfect for bandanas, just search for quilting fabric or anything that is 100% cotton.


Easy step-by-step tutorial: How to Make a Double Sided Dog Bandana Pattern
Materials you will need for your double sided dog bandana pattern:
- Two pieces of fabric (different prints – try Etsy)
- A sample bandana or large piece of paper to make your pattern
- Sharp scissors or rotary cutter
- Sewing Machine (this is a goodbasic beginner sewing machine)
- Sewing notions like thread
- Iron
- Ironing Board
STEP 1: Making your DIY paper pattern
I used a free bandana from a dog food company as a template since I knew it tied comfortably around Lucy’s neck. If you don’t already have a bandana, measure your dog’s neck or use their collar as a guide then add about 6-8” so you have length to tie in a knot. That will be the length of the long side.
Now that you have the length, figure out the height of your bandana by multiplying the length times .4.
For example. If your length is for a large dog and it’s 34” long. 34 x .4 = 13.6.
So from the center of the long side, down to the point of your triangle, should be about 13”. Make sense? Comment on this post if you need help!
Use the free bandana or your measurements to cut out a pattern for your reversible bandana on a piece of paper or thin plastic.
Always double-check that the size will fit your dog before you cut out the pattern. Bigger is better! You don’t want this bandana to be too tight on your pup.

Step 2: Cut out your bandana fabric
Use your new paper pattern and position it on your fabric.
It’s not required, but if you position the longest edge of the triangle bandana diagonally – or on the bias – that will give some extra stretch when you tie in on your dog’s neck.
Cut out 2 pieces of fabric. For this, I used 2 different fabric prints that complement each other. One will be the front and one will be the back of this reversible bandana.
Step 3: Sew and Press Your Reversible Bandana
Lay the cut-out fabric pieces with the good sides facing each other and sew all the way around, leaving 2 or 3 inches un-sewn. This is the hole you will use to flip everything right-side-out after the next step (so don’t flip yet!!).
We’re sewing straight lines here, but if you want to use a few pins to keep everything in place before you sew, that’s never a bad idea!
To give your new dog bandana a crisp, finished look, I press the seams open with an iron. If you need a good iron, have an older version of this iron and it always does the trick!

Step 4: Trim and flip your bandana right sides out
Trim any excess fabric from the seam allowances on the inside corners of your bandana to help things reverse neatly without bunching. Clipping the corners prevents too much bulk at the points when you flip this right side out.
Use the un-sewn 2-3 inch opening I mentioned earlier to turn your bandana right-side-out.
Step 5: Finishing Touches
You’re almost done with your new doggy fashions! Press the bandana with your iron one more time so that your edges are nice and crisp.
And finally, use your sewing machine or hand stitch to close the small opening you used to flip everything.
Optionally, you can also top stitch all the way around the bandana to give it an extra-professional finished look!
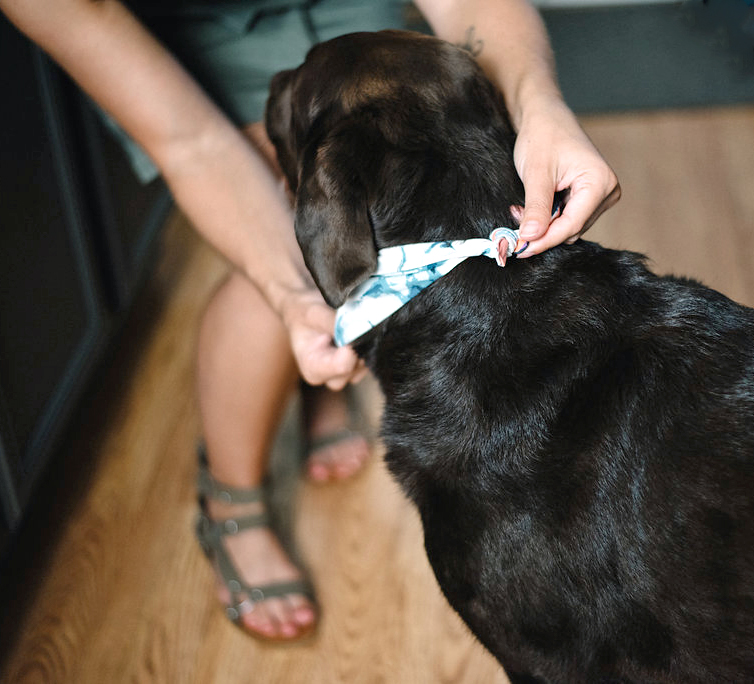
Now you are ready to tie your beautiful new reversible dog bandana around your dog’s neck and go for a walk to show it off!

Easy DIY Double Sided Dog Bandana Pattern Sewing Tutorial Tips
If you’re intimidated about the sewing part of this project, don’t be! I have the OLDEST Singer sewing machine (I think it might be older than I am) and it still works great. So, even if you don’t have a sewing machine of your own, I bet your aunt/grandma/mom has one in her basement that you can haul out!
If that’s not the case, you can pick up a very simple machine on Amazon for under $100! I’d recommend this Singer or this adorable little machine that’s $30!
Another tip for newbie sewers… embrace the iron! Ironing your fabric between every step will make your final project turn out so much better than if you skip it. Even for a simple bandana, it’s worth the time to press open your seams.
What fabric is best to use for dog bandanas? Pick a fabric that will be comfortable for your dog and not too hot. I would recommend 100% washable cotton fabric in the design and color of your choice.
If the fabric can’t handle moisture and shrinks, you will have to remake the item. That’s why I always wash, dry and press all fabrics before cutting and sewing. It makes my bandanas last longer, even when my dogs do their best to get them dirty!

How much fabric do you need to make a reversible dog bandana? The best answer is to measure around your dog’s neck with a tape measure first and then cut the triangles accordingly. It also depends on your dog’s size. Expect to use a lot more fabric when your pet is a Pitbull and not a Chihuahua!
The key is to make sure your dog is comfortable and that the bandana does not go on too tight. Your dog needs to be able to breathe and comfortably move without the bandana choking them, so it might be better to cut your triangle bigger than smaller. Too big is always better than too small!
What are the recommended dog bandana sizes? These are not over the collar dog bandanas, so take into account that the long edge of the finished bandana (after the seams are sewn) will need to be big enough to fit loosely around your pet’s neck plus extra inches to tie a small knot or bow.
Here are some rough guidelines for the length of the longest edge of your dog bandanas:
X-small (like yorkies) – 16”
Small (like a jack russel terrier) – 21”
Medium (like a border collie) – 28”
Large (like a boxer or labrador) – 34”
X-Large (like a Newfoundland or Bernese Mountain Dog) – 40”
Want a no-sew bandana instead? See how I recycle an old t-shirt into rainbow tie dye bandanas!

Love this post? You should check out these other DIYs:
DIY Concrete Dog Bowl Holder
DIY Flower Crown for Dogs
How to Take Better Dog Photos for Instagram
Treat Recipe and DIY Doggy Treat Bag
DIY Face Mask and Matching Bandana
*NEW: Rainbow Tie Dye Dog Bandana
PIN THIS!

All photos: Rose Colored Creative.
*This post contains affiliate links. Thank you for your support!


I love Lucy’s face in that last photo. So adorable.
Sampson does not care to wear the bandanas, but Delilah will tolerate them, and you are right, they are easy and cute!
Great idea, Easy to sew bandanas
Thanks for sharing, Very informative
Thanks For the Info